The Best Multicam Livestream Setup for Podcasting: 3 Proven Workflows (DIY → Studio)
Watch the full video: https://youtu.be/MKecWPDa-aE
Before you buy any camera for a multicam podcast or livestream, you need to answer one question:
Are you going to edit your own show… or are you going to work with a dedicated editor (now or soon)?
That single decision changes everything—because it determines whether you should build a workflow around:
A “program feed” (your live camera switching gets baked into the recording), or
Isolated camera recordings (“ISOs”) (each camera is recorded separately so an editor can rebuild the show in post).
In this guide, we’ll walk through three complete multicam setups we recommend—from a budget-friendly starter workflow to a full studio/PTZ workflow—including what you get at each level and how the workflow actually functions.
Disclosure: Product links below are included for convenience and may be affiliate links.
The 3 setups at a glance
Setup 1 — DIY Multicam Starter (≈ $600–$1,000+ depending on cameras)
Best for: DIY creators editing their own show, beginners learning multicam, anyone prioritizing simplicity
Core idea: 3 cameras → one computer → switch inside OBS (no hardware switcher)
Setup 2 — Creator Multicam Workflow (Mid-Range)
Best for: DIY creators who want noticeably better closeups + more control, still no switcher
Core idea: Better sensor(s) where it matters most (closeups) while keeping the same simple workflow
Setup 3 — Studio / PTZ Multicam (High-End)
Best for: Teams working with an editor, shows built for repurposing at scale
Core idea: Hardware switcher records each camera in 4K (ISOs), while you still livestream cleanly
The core principle: “Program feed” vs. “ISO recording.”
Program feed (Setups 1–2)
You switch cameras live inside software (OBS), and that switched output is what gets recorded.
Pros
Fastest path to publishing
No complex file management
Editing is dramatically reduced (because you already “edited” live)
Cons
If you forget to switch cameras, that mistake is “printed”
You can’t fully redo camera switching later
ISO recording (Setup 3)
Each camera gets recorded as its own file (usually on the switcher), so an editor can rebuild the show later.
Pros
Maximum post-production control
Best for clips, vertical content, and multi-platform repurposing
Editors love you forever
Cons
More gear + more complexity
Only worth it if you’ll actually use that post flexibility (i.e., you have an editor)
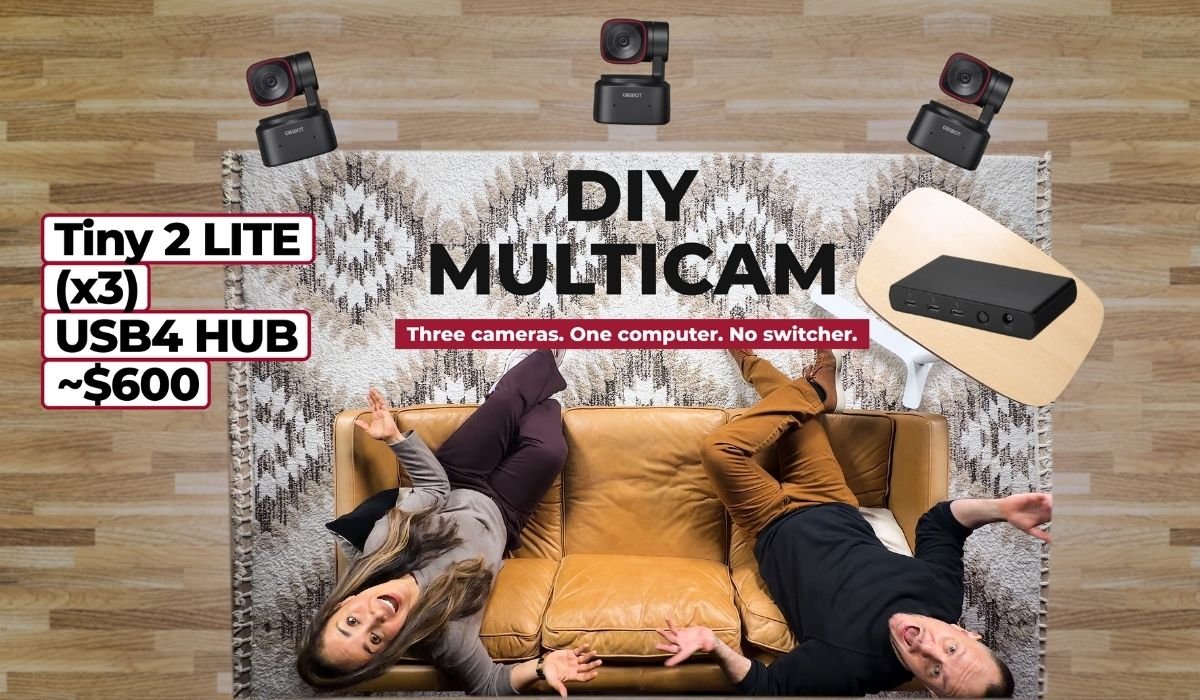
Setup 1: DIY Multicam Starter (≈ $600): “3 cameras, 1 computer, no switcher”
This is the simplest true multicam workflow that still feels professional: three real camera angles (not fake crops/digital zoom “angles”) switched live in OBS.
Recommended gear
3× OBSBOT Tiny 2 (https://geni.us/mchBN)
USB hub/dock (4K-capable) (https://geni.us/QGZ1Jm)
Note: Many creators run a “Lite” camera model to hit the lowest budget. The workflow is identical—the difference is image quality. If you can swing it, better cameras = better ingredients.
The workflow (how it works)
Plug all three cameras into your computer via the USB hub.
Use the OBSBOT Center app to:
pan/tilt/zoom your framing
set exposure/white balance (auto is fine to start)
In OBS:
Create one scene per camera (Wide / Host / Guest)
Switch scenes live using keyboard shortcuts (many creators use Up/Down arrows)
Start OBS Virtual Camera
Feed that virtual camera into Riverside for:
livestreaming
recording at high quality for later editing
Who this is for
You edit your own show (or want to)
You want to move fast and keep complexity low
You’re okay “performing” camera switching live
The honest trade-off
Switching cameras while hosting is like singing and playing guitar at the same time: doable, but it takes practice. You will occasionally forget to switch to the person talking. That’s normal.
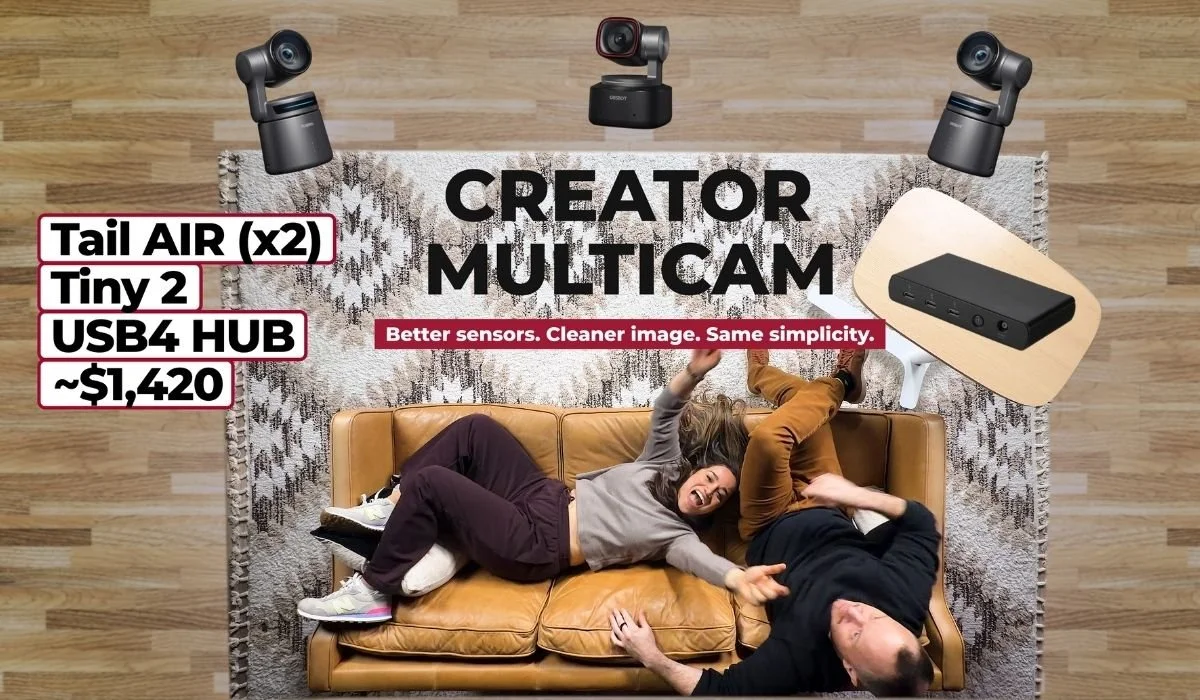
Setup 2: Creator Multicam Workflow (Mid-Range): “Same simplicity, better closeups”
Setup 2 keeps the same core approach as Setup 1—software switching in OBS—but upgrades the camera mix for creators who want a more polished, “pro” look.
Recommended gear (as covered in this setup)
2× OBSBOT Tiny 2 (https://geni.us/mchBN)
1× OBSBOT Tail Air (https://geni.us/Km7J)
USB hub/dock (4K-capable) (https://geni.us/QGZ1Jm)
Two smart ways to deploy these cameras
Because closeups matter most in podcasts, here are two practical configurations:
Option A (quality-first closeups)
Closeups: Tail Air + Tiny 2
Wide: Tiny 2
This prioritizes your “talking head” shots.
Option B (flexibility + wireless control angle)
Closeups: 2× Tiny 2
Wide or specialty angle: Tail Air
This can be great if you want one angle you can tweak more dynamically (Tail Air control options are a standout).
Why Tail Air is a big step up
In real-world podcast lighting (which is often not perfect), the Tail Air tends to shine because it offers:
A larger sensor feel and cleaner processing
Better dynamic range in tricky rooms
PTZ control with the added benefit of wireless control via phone/tablet (a meaningful workflow upgrade)
Who this is for
DIY creators who still want a plug-and-play workflow
Podcasters leveling up from “good webcam” to “polished show”
Anyone who wants better closeups without buying a hardware switcher
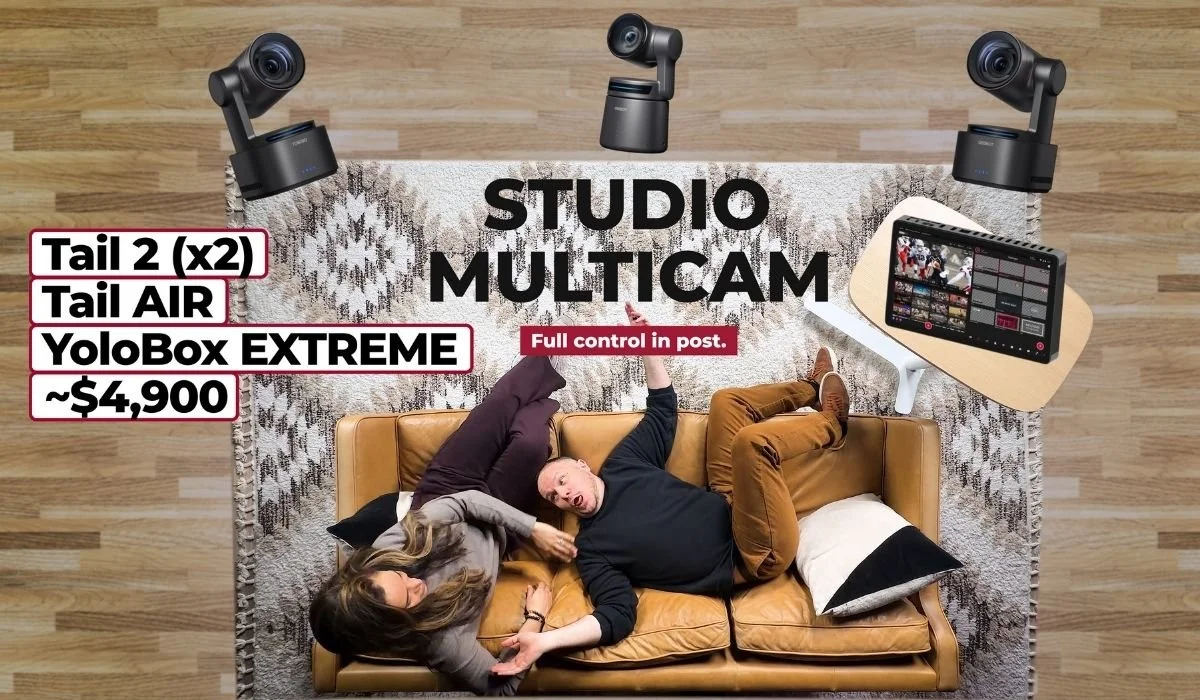
Setup 3: Studio / PTZ Multicam (High-End): “4K ISOs + editor-first workflow”
This is the setup that changes how your show scales—because you stop “baking in” creative choices live and start capturing your livestream as a production asset.
Recommended gear
2× OBSBOT Tail 2 (https://geni.us/mBnb3Ae)
1× OBSBOT Tail Air (https://geni.us/Km7J)
4K camera switcher (https://amzn.to/4rtIcNX)
Why this setup is different
1) Tail 2 gives you true optical zoom
Optical zoom means the lens physically zooms—so you can frame tight closeups from farther away without losing image quality. It’s a big part of that “buttery,” professional look.
2) The switcher can record each camera separately in 4K (ISOs)
That’s the whole point: your editor gets:
Camera A (4K file)
Camera B (4K file)
Camera C (4K file)
Plus your audio
…so they can rebuild the show in post with full control.
3) You still livestream cleanly
You can send the switcher’s program feed into Riverside (or your streaming platform of choice), invite remote guests, share screens, etc.—while your best-quality camera files record locally.
Who this is for
You already have an editor (or you’re ready to hire one)
You want to repurpose heavily: clips, highlights, vertical video, thumbnails
You treat livestreams as raw material for a content engine
The real payoff (time and output)
At this level, you’re not just buying cameras—you’re buying time back.
A good editor can spend 6–12 hours/week turning one livestream into:
multiple episodes
multiple short clips
highlights
social-ready verticals
polished final exports
If you’re doing all of that yourself forever, you’re not “a creator who edits”… you’re an editor who occasionally creates.
How to set up OBS for Setups 1–2 (USB hub workflow)
This is the repeatable “recipe” that makes Setup 1 and Setup 2 work.
1) Install your control app + OBS
Install OBSBOT Center (for PTZ + camera settings)
Install OBS (free)
2) Plug in cameras through your USB hub
You want a hub that can handle serious bandwidth—multicam 4K is not the place to cheap out on a flimsy adapter.
3) Set OBS to 4K (critical)
In OBS settings:
Base (Canvas) Resolution: 3840×2160
Output (Scaled) Resolution: 3840×2160
This ensures your entire OBS pipeline is built for 4K.
4) Create a simple multicam scene structure
Keep it simple:
Scene 1: Wide
Scene 2: Host closeup
Scene 3: Guest/co-host closeup
Each scene contains one “Video Capture Device” source.
5) Enable keyboard switching
In OBS hotkeys, map:
Next scene / Previous scene
to something you can do without thinking (Up/Down arrows are common).
6) Start OBS Virtual Camera
This turns OBS into a “camera source” that other apps can use.
7) Record + livestream through Riverside
In Riverside:
Select OBS Virtual Camera as your camera
Set Recording Resolution to 4K (Riverside often defaults to 1080p—change it)
Now you can:
Invite remote guests
share screens
record locally-per-person in the cloud
keep a clean multicam program recording
Quick framing + camera matching tips (that save hours later)
Start with the wide shot first
Build your wide shot so it doesn’t include your close-up cameras in the frame.
Once wide is locked, build close-ups around it.
Keep composition consistent
A simple rule that works:
If the host sits on the left side of the wide shot, frame them slightly left in their closeup.
If the co-host sits on the right, frame them slightly right in their closeup.
That way, when they turn to each other, eye-lines feel natural.
Auto is fine—until it isn’t
If you’re new: keep cameras on auto to avoid overwhelm.
When you’re ready to level up:
Lock white balance
Lock exposure
This prevents distracting “breathing” shifts as people move.
Match cameras by eye (simple method)
Push white balance too warm → too cool until you find “your” look
Set exposure so faces aren’t blown out
Prefer lower ISO when you can (less noise)
If all three cameras are the same model, matching is much easier—often you can reuse the same settings.
How Setup 3 (hardware switcher workflow) fits with livestreaming
A clean mental model:
Hardware switcher = ISO recorder + live switcher
Riverside = remote guest + clean livestream + cloud backup
So your workflow becomes:
Cameras → switcher (HDMI/USB-C depending on camera)
Switcher records each camera to fast storage (4K ISOs)
Switcher sends the live program feed into Riverside (via capture)
Riverside records guests/screen shares cleanly
Result: your editor gets the best of both worlds.
Which setup should you choose?
Pick based on your editing reality:
Choose Setup 1 if…
You’re doing everything yourself
You want the simplest, cheapest true multicam workflow
You’re okay with live camera switching being “baked in”
Choose Setup 2 if…
You want noticeably better closeups
You still want the simplicity of the USB + OBS workflow
You’re growing and you care about production value
Choose Setup 3 if…
You have (or want) an editor
You want to repurpose at scale
You want true post-production control via 4K ISOs
Podcast Multicam Livestream Setup FAQ
What is the best multicam setup for podcasting beginners?
The best beginner multicam podcast setup is three OBSBOT Tiny 2 cameras connected through a 4K-capable USB hub, switched live inside OBS, and fed into Riverside for recording and streaming. No hardware switcher needed. The entire setup runs under $1,000 and gives you three real camera angles: wide, host closeup, and guest closeup, without requiring any technical background to operate.
Do I need a hardware switcher for a multicam podcast?
No — beginners and mid-level creators don't need a hardware switcher. Setups 1 and 2 in this guide use OBS as a software switcher, which handles live camera switching at no additional cost. A hardware switcher only becomes necessary when you want to record each camera as a separate 4K file (called ISO recording) for a dedicated editor to work with in post-production.
What is ISO recording, and why does it matter for podcasting?
ISO recording means each camera in your setup records as its own individual file rather than as a single switched output. This gives your editor complete creative control in post — they can rebuild the show, recut reaction shots, create vertical clips, and repurpose content without being locked into the live switching decisions you made during the recording. ISO recording requires a hardware switcher like the YoloBox Extreme and is best suited for creators who work with a dedicated editor.
Can I use OBSBOT cameras for a multicam podcast livestream?
Yes — OBSBOT cameras are one of the best options for multicam podcast livestreaming because they connect via USB, support 4K recording, include AI tracking and PTZ controls, and are designed to work together in multi-camera setups. The OBSBOT Tiny 2, Tail Air, and Tail 2 are all covered in this guide and have been personally tested by our team.
What software do I need for a multicam podcast setup?
You need two free applications: OBS Studio for live camera switching and scene management, and OBSBOT Center for controlling your PTZ camera settings, framing, and exposure. Both are free to download. For recording and livestreaming, Riverside handles your guests, cloud recording, and multi-platform streaming. Use code PSS at riverside.com for 15% off.
How do I connect multiple cameras to one computer for podcasting?
The cleanest method for webcam-style cameras like the OBSBOT Tiny 2 is a 4K-capable USB hub or dock. Each camera plugs into the hub, the hub connects to your computer, and OBS recognizes each camera as a separate video capture device. From there you assign each camera to its own scene in OBS and switch between them live using keyboard shortcuts.
What is the difference between a program feed and ISO recording for podcasts?
A program feed is a single video file that records your live camera switching as it happens — whatever camera you cut to during the show is baked into the final recording. ISO recording captures each camera separately as its own file, so an editor can decide which camera to use in post. Program feed workflows are faster and simpler. ISO workflows give editors maximum flexibility but require a hardware switcher and more complex post-production.
How much does a professional multicam podcast setup cost?
A beginner multicam podcast setup using three OBSBOT Tiny 2 cameras and a USB hub starts around $600–$1,000. A mid-range setup adding an OBSBOT Tail Air runs $1,200–$1,800. A full pro setup with OBSBOT Tail 2 cameras, a hardware switcher, and ISO recording capability runs $4,000–$6,000 depending on configuration. All three setups are covered in detail in this guide with full gear lists and affiliate links.
Can I livestream a multicam podcast to YouTube and record at the same time?
Yes — this is exactly what the OBS Virtual Camera plus Riverside workflow enables. OBS handles your live camera switching and sends a virtual camera feed into Riverside. Riverside records your guests, handles multi-platform streaming to YouTube, Facebook, LinkedIn, and X simultaneously, and stores cloud backups of the session. You go live and record a polished version in the same session.