How to Start a Video Podcast in 2026 (Studio, Gear, Editing & Distribution)
Starting a podcast used to mean grabbing a microphone and hitting record. In 2026, that’s no longer enough.
If you want people to actually find your show on YouTube, Spotify, Apple Podcasts, and beyond video podcasting is no longer optional. The good news? You don’t need a studio team, expensive gear, or years of experience to get started.
Links to all of the recording gear below
Watch the full step-by-step video here👇🏼
In this guide, you’ll learn exactly how to start a video podcast from scratch, using the same workflows we use at PSS Creative Media to help creators and clients launch professional shows that actually get discovered.
Why Video Podcasts Matter in 2026
Podcast listening hasn’t disappeared but podcast discovery has changed.
Platforms like YouTube, Spotify, and Apple Podcasts now prioritize video-first shows. Video clips, previews, and full episodes are what get surfaced in feeds, recommended pages, and search results.
That means:
Audio-only podcasts are harder to discover
Video podcasts get more reach, visibility, and engagement
Creators who start with video build momentum faster
If your goal is growth—not just recording—video is the foundation.
The Always-Ready Solo Video Podcast Studio
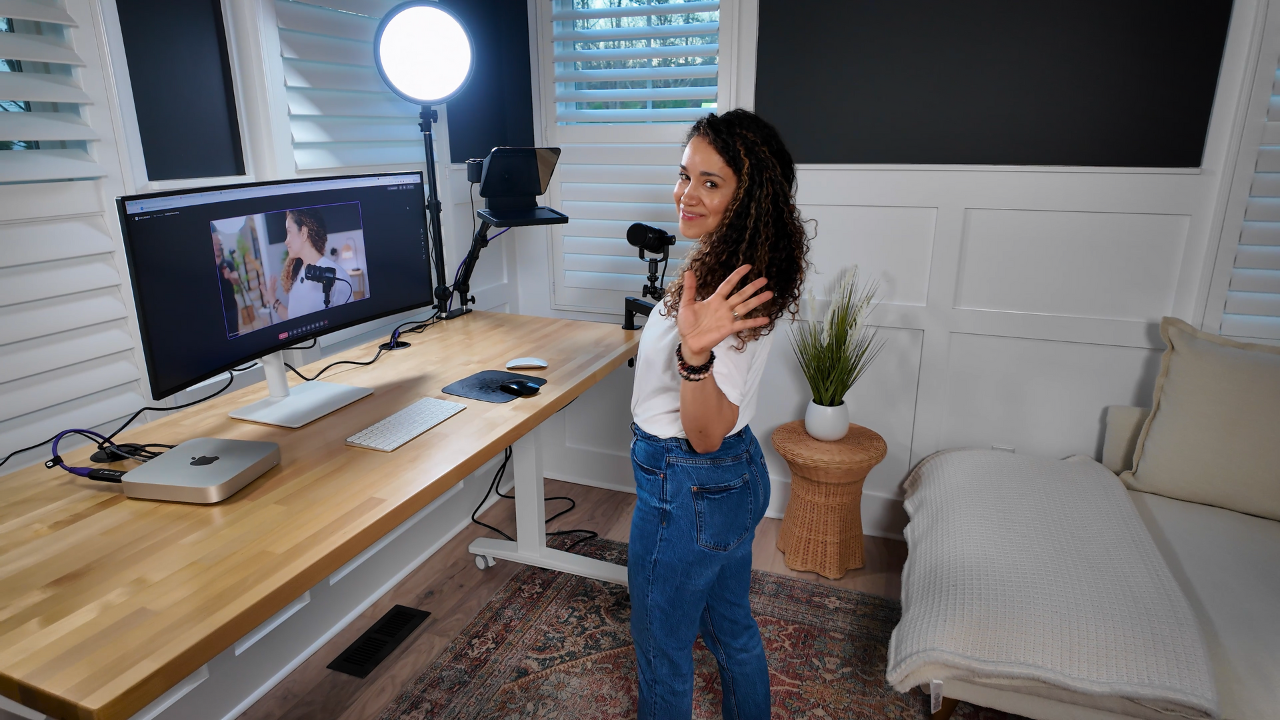
The most common (and effective) setup we recommend is what we call the always-ready solo studio.
The goal is simple:
remove friction between having an idea and hitting record.
Instead of setting up and tearing down gear every time, everything stays connected:
Camera
Microphone
Lights
Computer
This allows you to:
Record solo episodes instantly
Join remote podcasts as a guest
Run workshops, trainings, or Zoom calls
Stay consistent without burnout
Consistency beats complexity every time.
Gear Links
Lights https://geni.us/yvdq2G
Dual Clamp https://geni.us/y7Dxms
Camera https://geni.us/F2Hd
Microphone https://geni.us/7Ym5
Camlink HDMI- USB Converter https://geni.us/Q0pS
Low Profile Mic Boom Arm https://geni.us/YOoM
Prompter https://geni.us/SAbp0qA
Under Desk Walking Pad https://geni.us/VQFGBtq
Recording Solo or Remote Video Podcasts

For recording, we use Riverside because it solves multiple problems at once:
Local high-quality video and audio recording
Remote guest recording with separate tracks
Simple browser-based setup (no downloads for guests)
Built-in editing and AI tools
You choose your camera and microphone, send your guest a link, and press record. No complicated routing. No tech panic.
Links
Try Riverside: https://www.pss.media/riverside
Use promo code PSS to get 15% discount on any plan.
Solo Budget-Friendly Video Podcast Setup (Beginner Approved)
If you want to start a video podcast without spending a lot of money, this is the setup we recommend most often for beginners.
This solo budget-friendly video podcast setup is designed to be:
Simple
Affordable
Plug-and-play
Easy to upgrade later
It’s perfect if you’re recording alone, appearing as a guest on other podcasts, or just want to get started without overthinking gear.
Camera (Simple, Plug-and-Play)
For this setup, we use a compact plug-and-play webcam-style camera that can record in up to 4K directly into your computer or into your recording software.
The big advantage here is simplicity:
No capture cards
No complex camera menus
No technical setup headaches
You plug it in, select it as your camera, and you’re ready to record.
Microphone (Affordable, High-Quality Audio)
For audio, we use a USB dynamic microphone, which is one of the best values for podcasters.
This type of mic:
Connects directly to your computer
Rejects background noise better than condenser mics
Sounds far better than built-in laptop or webcam microphones
It’s an ideal choice if you’re working in a normal room and want clean, professional audio without an audio interface.
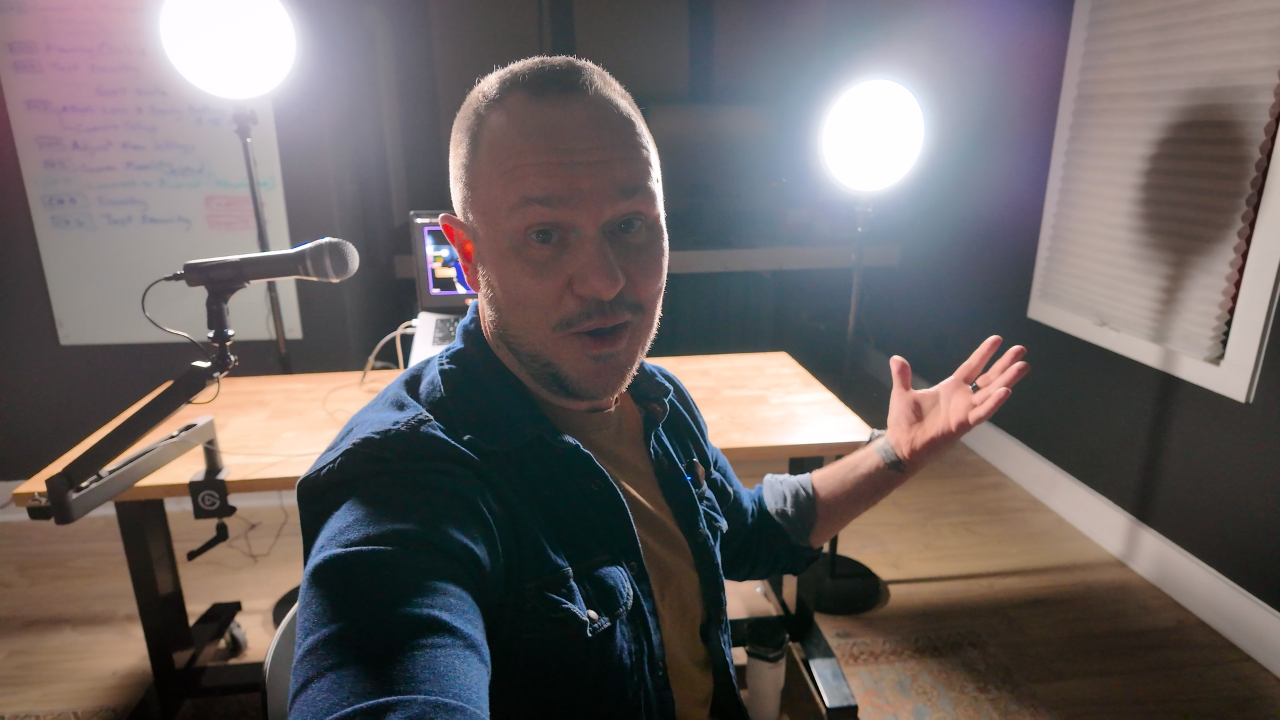
Lighting (Affordable and Effective)
Lighting makes a bigger difference than most people expect.
In this setup, we use two affordable LED panel lights placed in front of you to evenly light your face. The key here is not brightness, but soft, balanced light.
Many budget lights come with stands, which makes this setup easy to move, adjust, and reuse in different spaces.
Why This Setup Works
This solo budget setup works because it removes friction:
No complicated wiring
No advanced camera knowledge
No expensive upgrades required
You can sit down, turn everything on, and start recording in minutes. And when you’re ready to level up, every piece of this setup can be upgraded without replacing everything.
Gear Links
Webcam https://geni.us/kxRiG
Microphone https://geni.us/x0X1
Lights https://geni.us/yvdq2G
Two-Person Video Podcast Setup (Co-Host, Same Room)
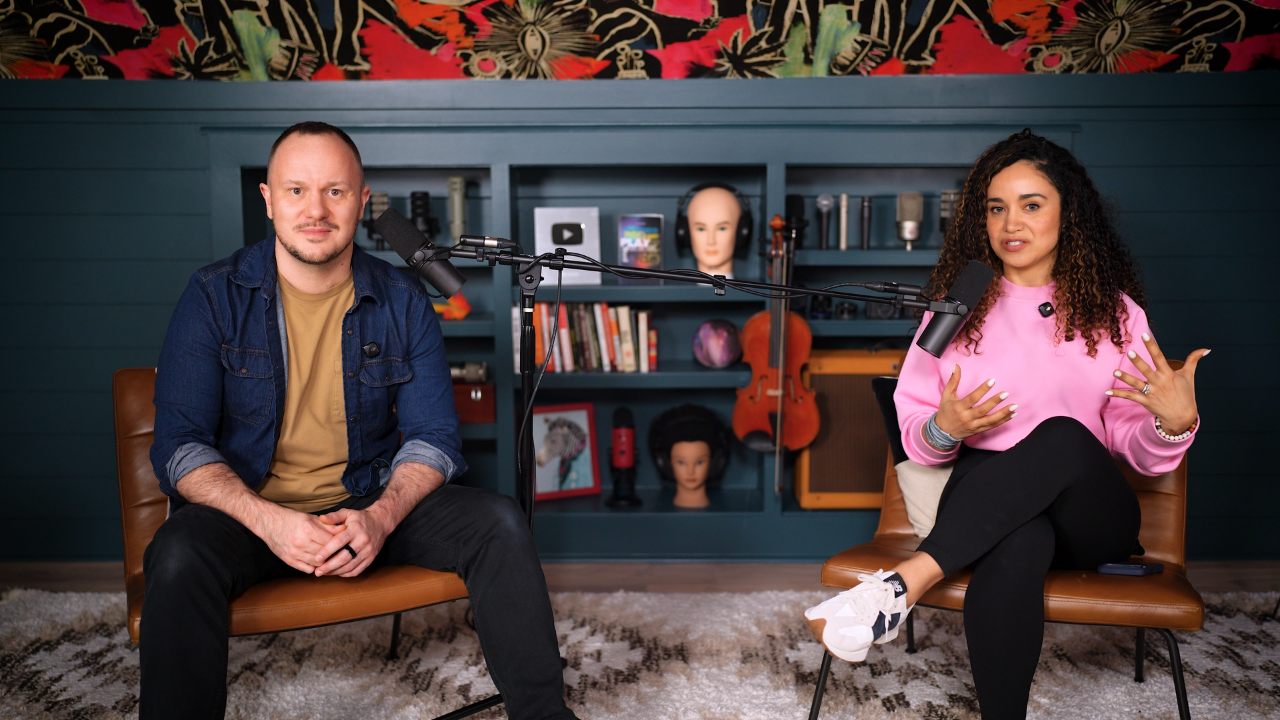
If you’re not recording solo and you want a co-host video podcast setup where two people sit in the same room this is one of the most common setups we build for creators.
The good news: you still don’t need a studio team or multiple cameras.
In the video, we show a single-camera, two-person podcast setup that looks cinematic and stays simple to run. This kind of setup is ideal for co-hosts because it reduces complexity while still giving you a professional look on YouTube.
Camera + Capture (Single Camera, Pro Look)
For this setup, we use a Sony A7 IV with a 35mm lens for a clean, cinematic image. To record that camera directly into your computer (and into Riverside in 4K), you’ll need an HDMI-to-USB capture card—we use the Elgato Cam Link 4K so the camera behaves like a high-quality webcam.
Lighting (Flattering Light for Two Faces)
For lighting, the goal is simple: soft, even light on both hosts.
We use a two-light key setup (one aimed at each person) and then add a stronger fill/background light to lift the whole scene. If you’re using LED panels, softbox attachments make a huge difference. They soften shadows and improve skin tones on camera.
Audio (Two Mics, Separate Tracks)
For co-host audio, the classic choice is the Shure SM7B (one mic per person). Since the SM7B is an XLR microphone, you’ll need an audio interface. In the video, we use the SSL 2+ to get clean gain and a fuller sound.
One of the biggest workflow upgrades in this setup is recording each mic to its own track (so your audio is easier to mix, clean up, and level).
Recording in Riverside (Same Room + Separate Inputs)
Riverside has become known for remote recording, but it’s also great for co-hosts in the same room because you can record:
one camera feed
two microphones
separate audio tracks
That means you can take advantage of tools like Magic Audio and Smart Mute, which help reduce bleed and automatically lower the mic of the person who isn’t speaking. The result is a cleaner, more professional mix without a complicated post-production workflow.
Gear Links
Camera https://geni.us/6aWBCGi
Camlink HDMI- USB Converter https://geni.us/Q0pS
Softboxes https://geni.us/8nwZiH
Panel Lights https://geni.us/XS8I
Fill light https://geni.us/0hRpn
Microphones https://geni.us/7ko53
Audio Interface https://geni.us/VzGALA
XLR Cables https://geni.us/LScP
Editing and Distributing Your Video Podcast (Where Most Shows Win or Fail)
Recording your podcast is only half the job. Editing and distribution are what determine whether anyone actually finds your show.
This is where many podcasts stall. Not because the content is bad, but because the workflow breaks down after recording.
Editing Your Video Podcast Without Overthinking
Modern podcast editing does not require advanced software or technical skills.
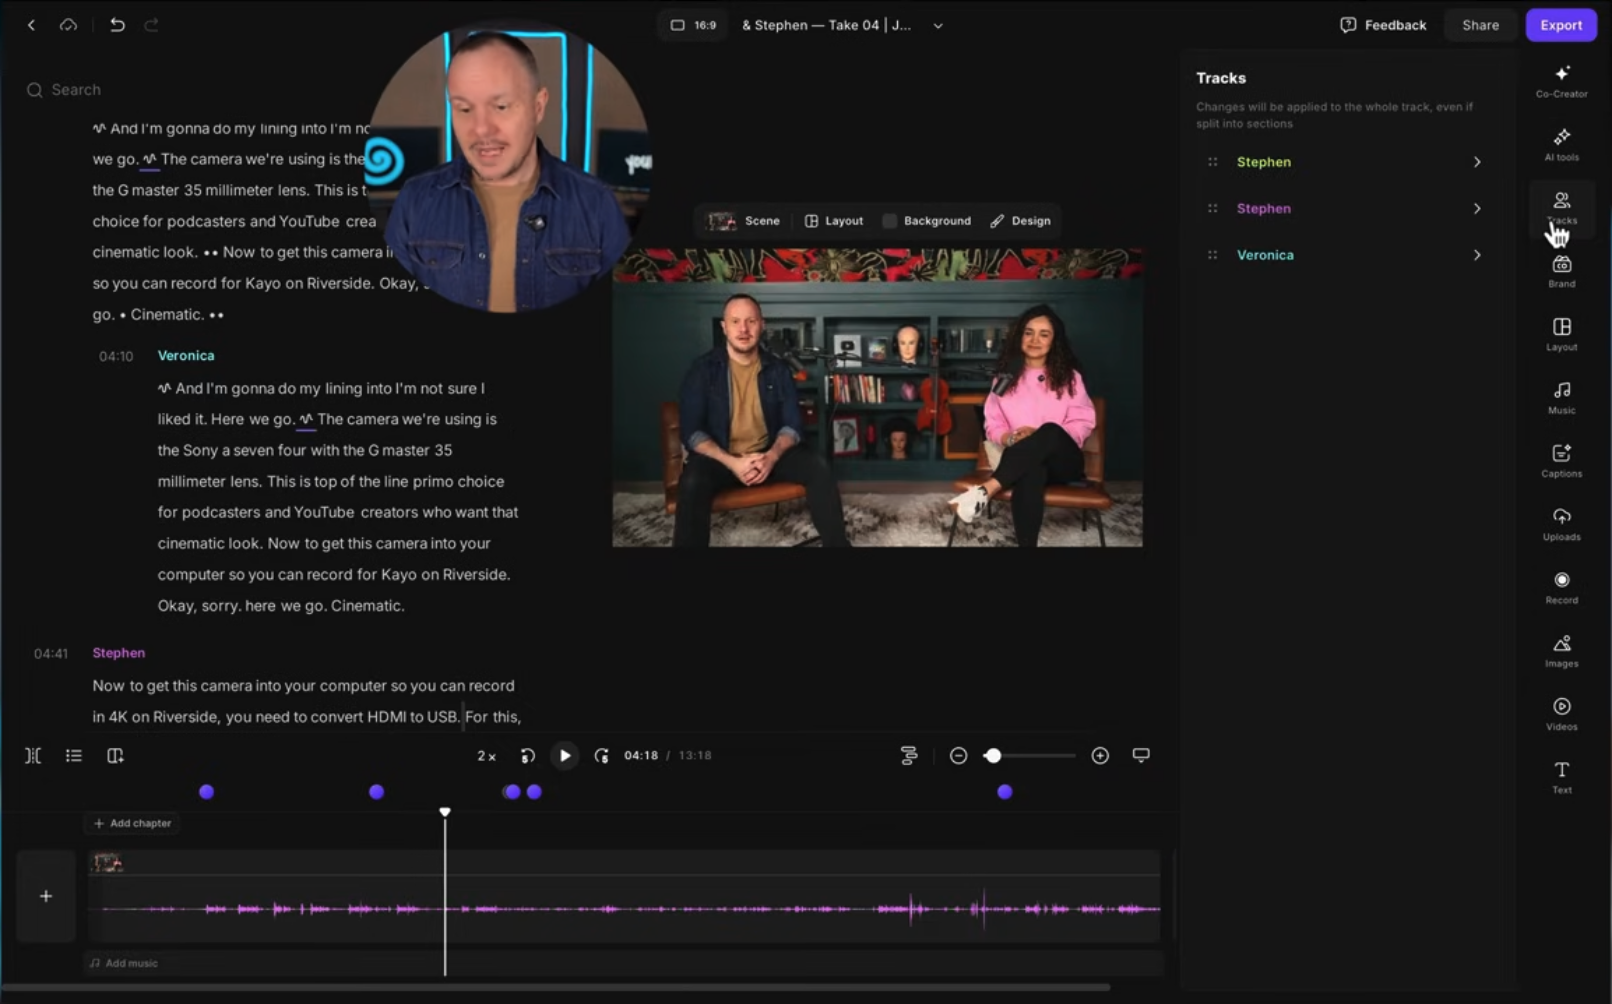
Using a tool like Riverside, you can edit your video podcast in two simple ways:
Transcript editing where you delete words like a Google Doc and the video updates automatically
Timeline editing if you prefer a more traditional approach
This makes it easy to:
Trim the beginning and end of episodes
Remove filler words and long pauses
Clean up audio quickly using AI processing
Maintain a natural, conversational feel without jumpy edits
For longer episodes, features like faster playback speed help cut editing time dramatically. The goal is not perfection. The goal is clarity, momentum, and consistency.
Once editing is done, export your episode in high quality so it is ready for every platform.
Distribution Is Not an Afterthought
Most podcasts don’t struggle because the content is bad.
They struggle because distribution wasn’t planned before recording.
Before you upload anything, platforms need clear signals about:
what your show is
who it is for
how it should appear in search and recommendations
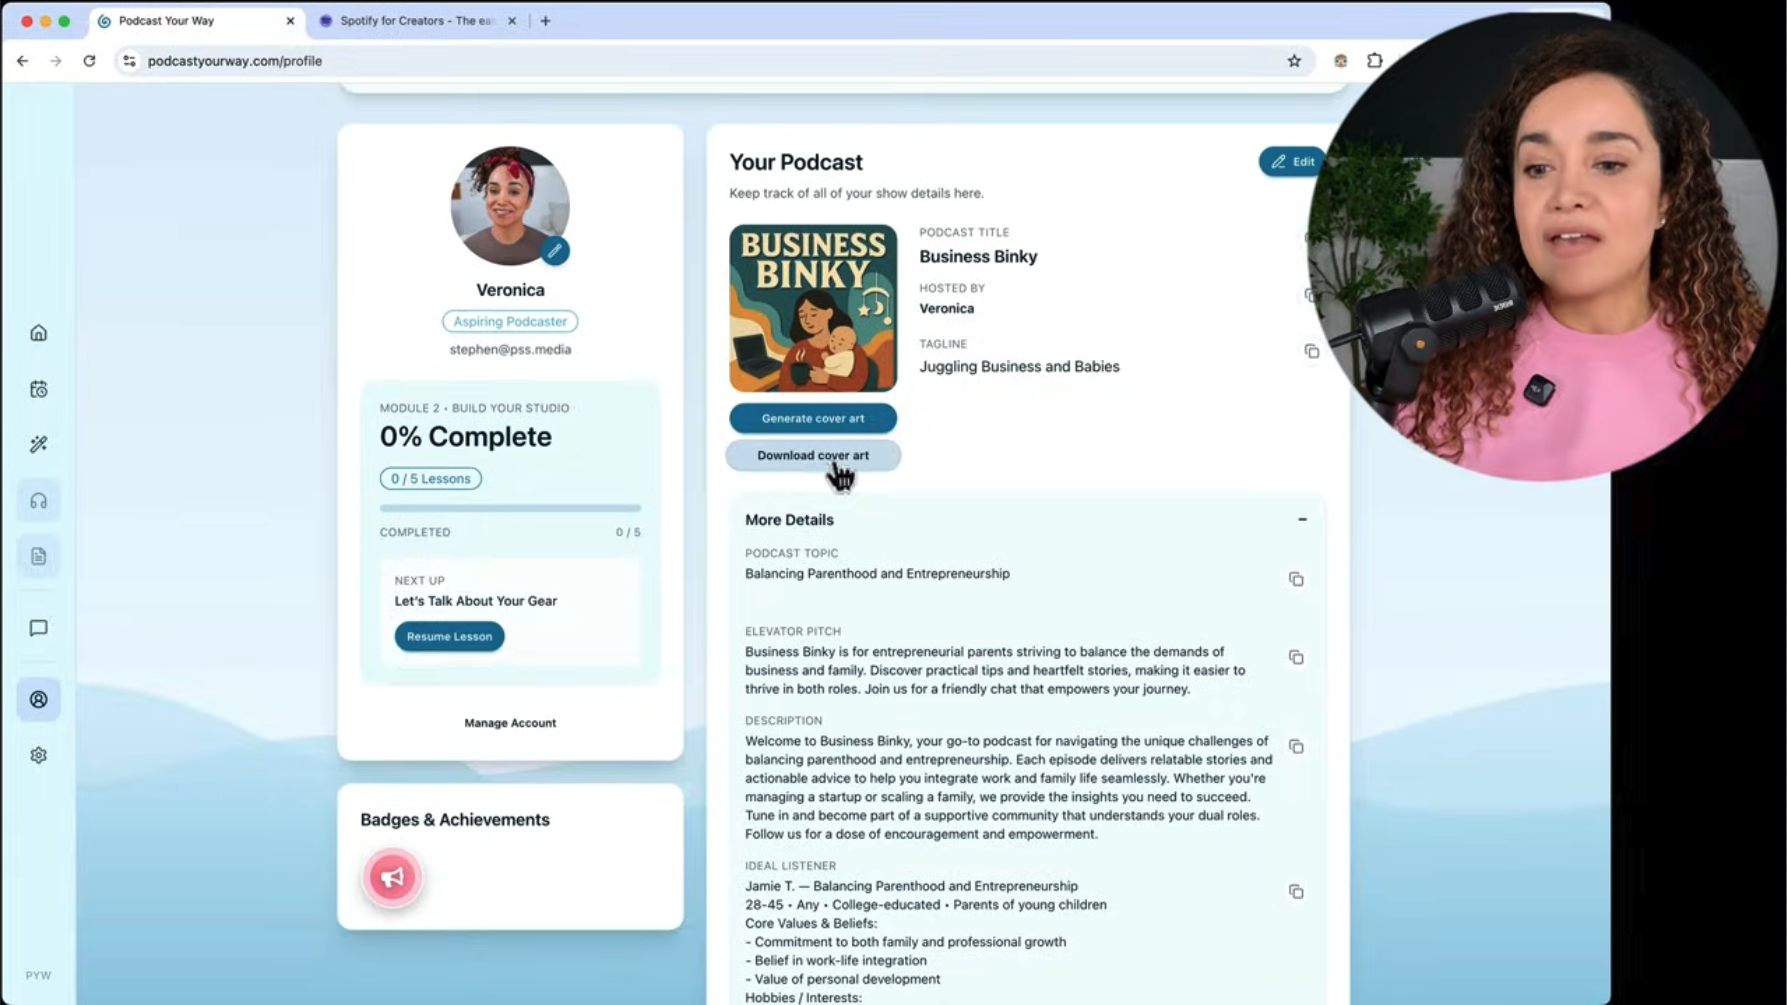
This is where Podcast Your Way fits into the workflow.
We use Podcast Your Way to generate all of the posting assets needed for distribution, before an episode ever goes live. That includes:
a clear, searchable podcast name
a focused podcast description
audience positioning and category guidance
consistent language you can reuse across platforms
Instead of guessing what to write when uploading to Spotify or Apple Podcasts, Podcast Your Way becomes the source of truth for your show.
You copy the assets directly into Spotify for Creators and use the same information when publishing on other platforms. This keeps your podcast consistent, searchable, and correctly positioned from day one.
Distribution works when it’s intentional. Podcast Your Way is what makes that possible in this workflow.
Links
Sign up for Podcast YourWay. It’s Free https://www.podcastyourway.com/
The Setup Is Only the Beginning
You can follow every step in this guide.
You can buy the right gear.
You can use the right tools.
And still feel stuck.
Because clarity doesn’t come from information alone.
It comes from having someone in the room who sees what you can’t see yet.
That’s why we offer one-on-one services.
Not for creators who want shortcuts.
For creators who are serious about building something that lasts.
If you want help designing your studio, refining your workflow, or launching your podcast the right way, we’ll meet you exactly where you are and build forward from there.
No templates.
No guesswork.
No wasted time.
If this guide helped you see what’s possible, one-on-one work is how we help you make it real.