Home Podcast Studio Setup | Turn Your Home Office Into a Podcast & Video Studio
Links to the equipment, furniture, props, and decor I use in building the studio are included.
Looking for a podcast studio near you? It’s not easy. I tested this myself. I try to find a podcast studio in the Triangle Area or Charlotte, North Carolina, where I live, but it is almost impossible. And the two I saw were nearly an hour away from my home.
Rental studios can be expensive, hard to book, and a hassle to travel to. That’s why one of the smartest investments you can make is creating your own home podcast studio setup.
With the right gear and a little creativity, you can turn a forgotten corner, even a couch nobody uses, into a professional podcast and video studio that helps you create content consistently without breaking the bank.
At PSS Creative Media, we’ve been building and designing studios for over seven years. From our own home setups to client projects, we’ve tested what works and simplified the process so you don’t waste money on unnecessary equipment.
This guide walks you step-by-step through building a studio that looks and sounds professional.

Why Build a Home Podcast Studio?
The main reason for building a podcast studio is convenience. But here are more:
Save money compared to renting a studio
Record on your schedule without travel or booking stress
Control your environment for consistent quality
Create content faster so you can publish regularly
Whether you want to start a podcast, launch a YouTube channel, or record professional videos for your business, building a home studio is the most efficient way to start.
Step 1: My Most Favorite Camera and Lens Combo for Video Podcast
For beginners and pros alike, the best combo is the Sony ZV-E10 paired with the Sigma 16mm f/1.4 lens.
The Sigma lens creates a beautiful blurred background for a cinematic look.
The ZV-E10 is intuitive, affordable, and creator-friendly.
This setup works in small home offices as well as larger rooms.
This combination gives you professional quality without requiring a big studio.

Step 2: The Perfect Camera Tripod (Lightweight + Sturdy)
A flimsy tripod can ruin your setup. You need to protect your investment and have your new camera and lens supported by a good quality tripod without breaking the bank—obviously, my recommendation: the NEEWER 66" Carbon Fiber Tripod.
Why it works:
Extends to 66” for standing or high-stool recordings
Collapses small for low-angle or casual couch shots
Quick-release plate for easy camera swaps
Lightweight but strong enough for a Sony ZV-E10 with Sigma lens

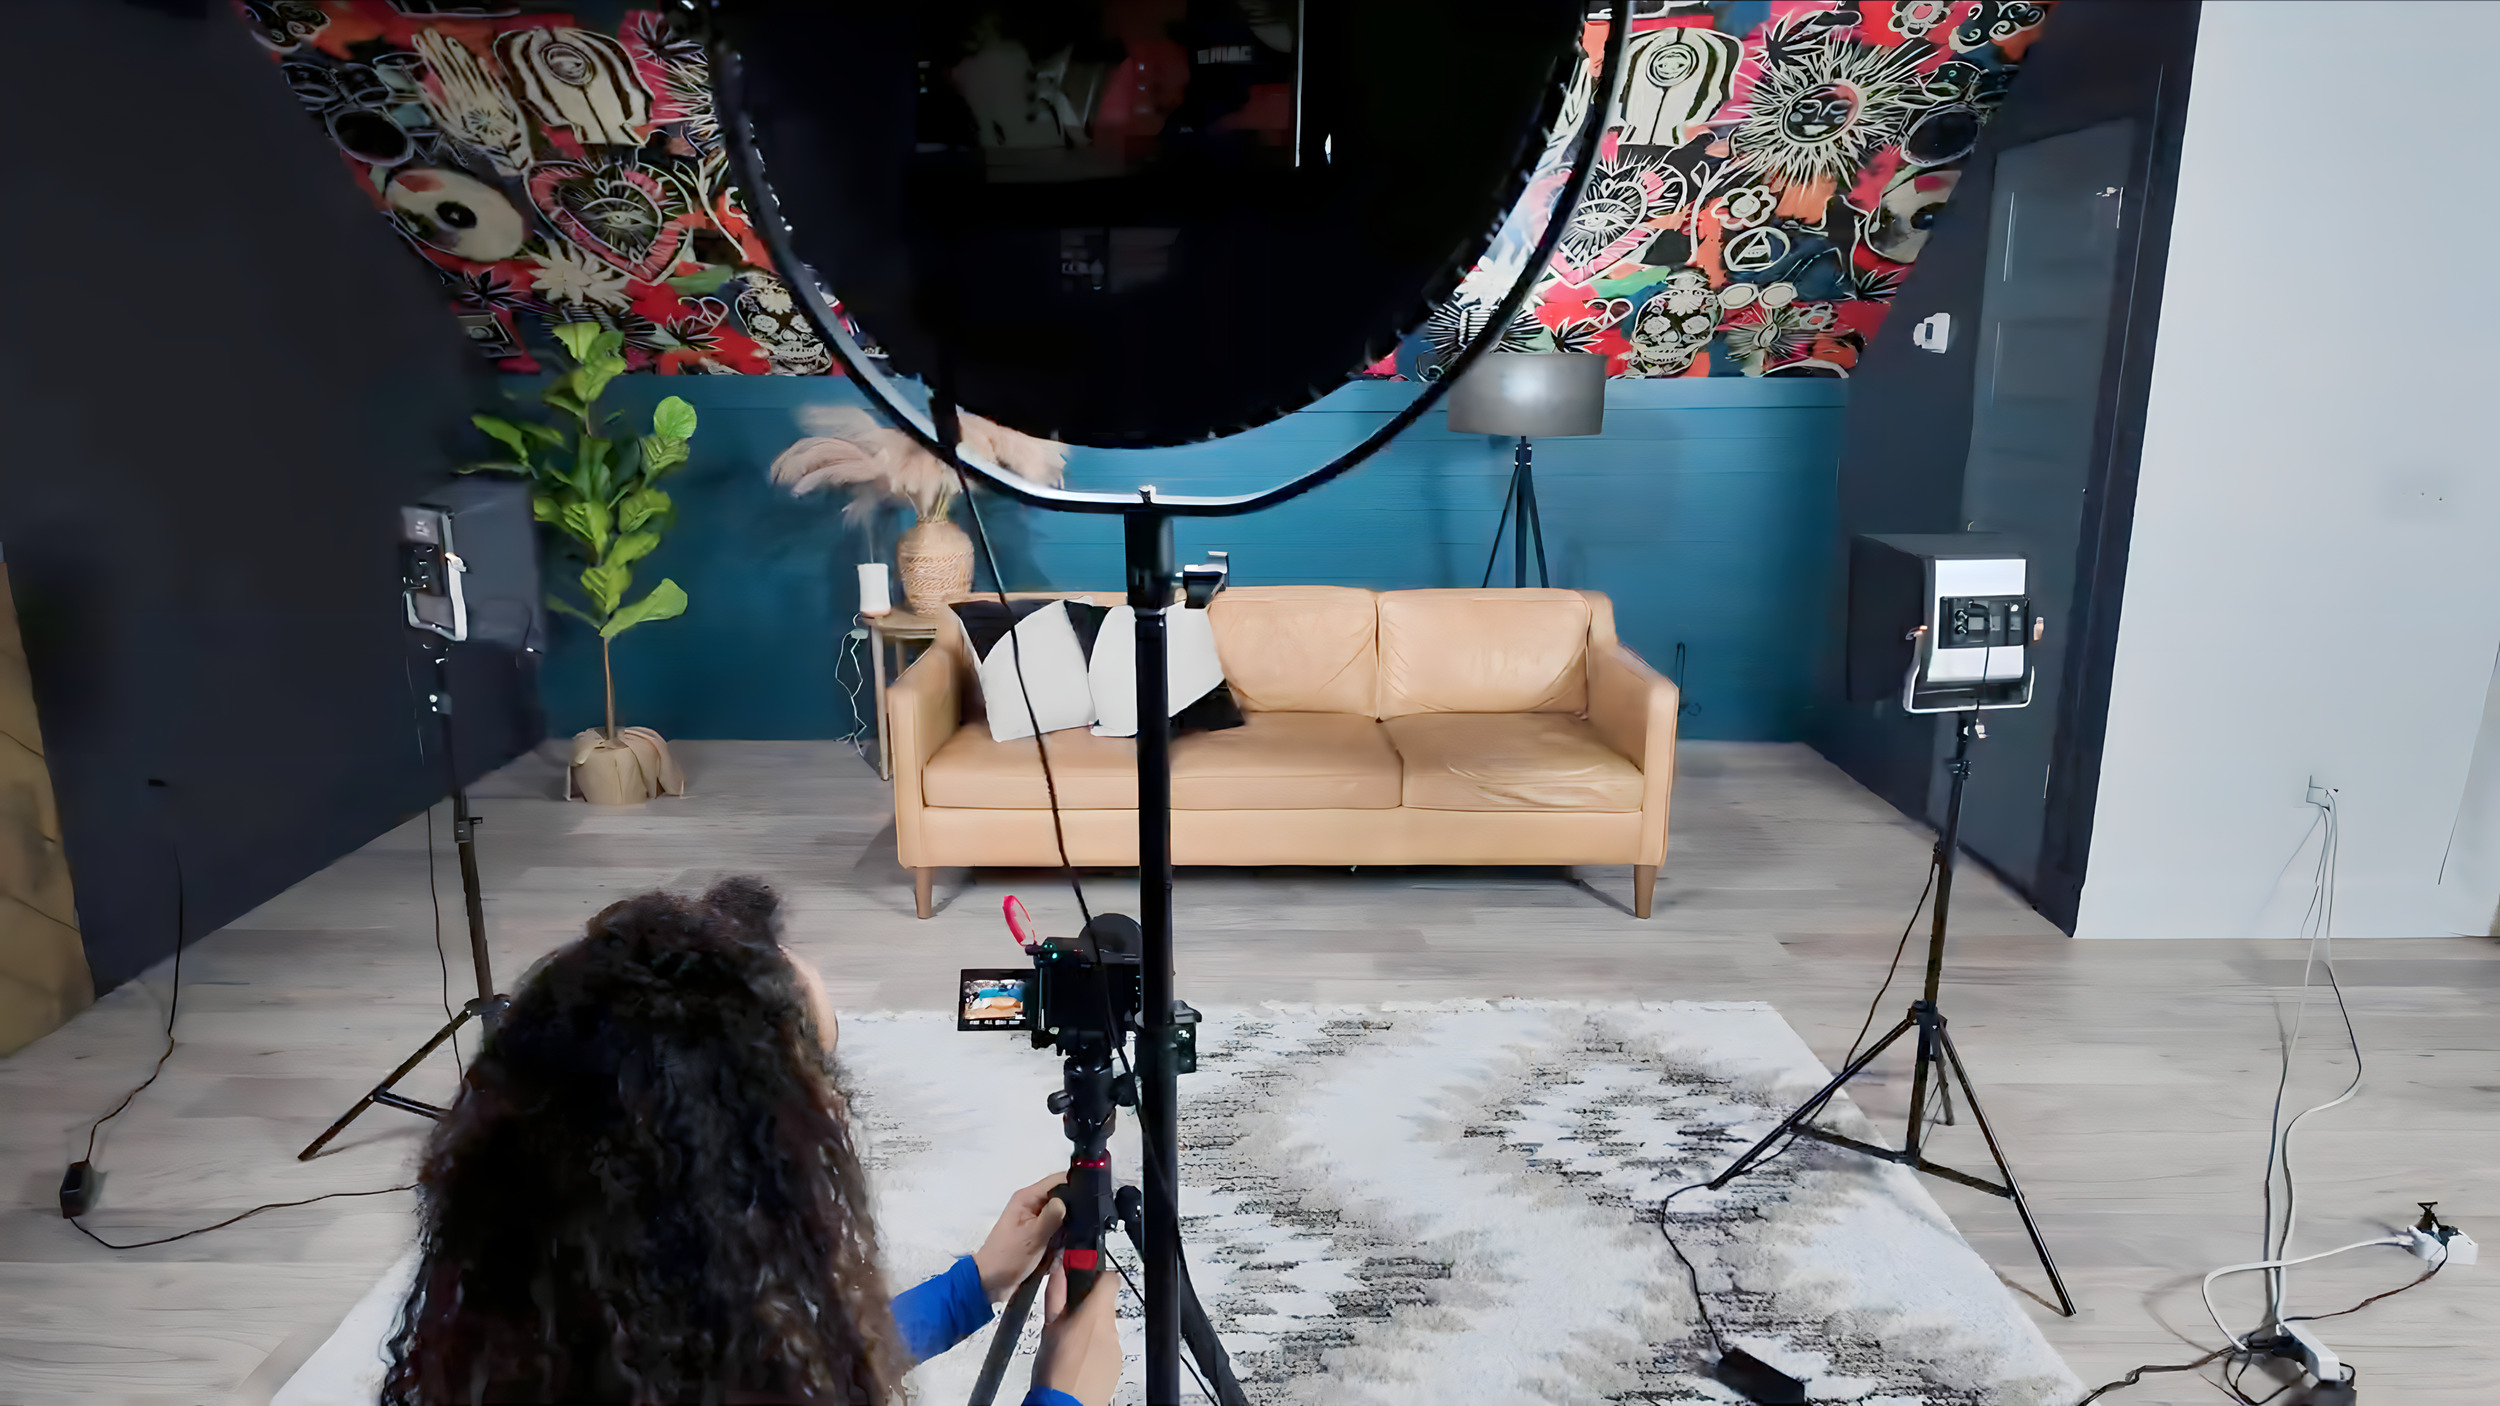
Step 3: Design Your Recording Shot
This is where we decide what our audience will see, and everything that goes into the shot is intentional, designed to create an atmosphere and a feeling that you want your audience to experience while watching.
So I went around my house and found a few things: pillows, a floor lamp, and a tree. This will add personality and give my shot more character.
Now, when you’re creating the perfect shot, there’s no way around it; you will have to move things around and move your camera until it looks good.
Just make sure that there’s not too much headroom and that the camera is eye level.

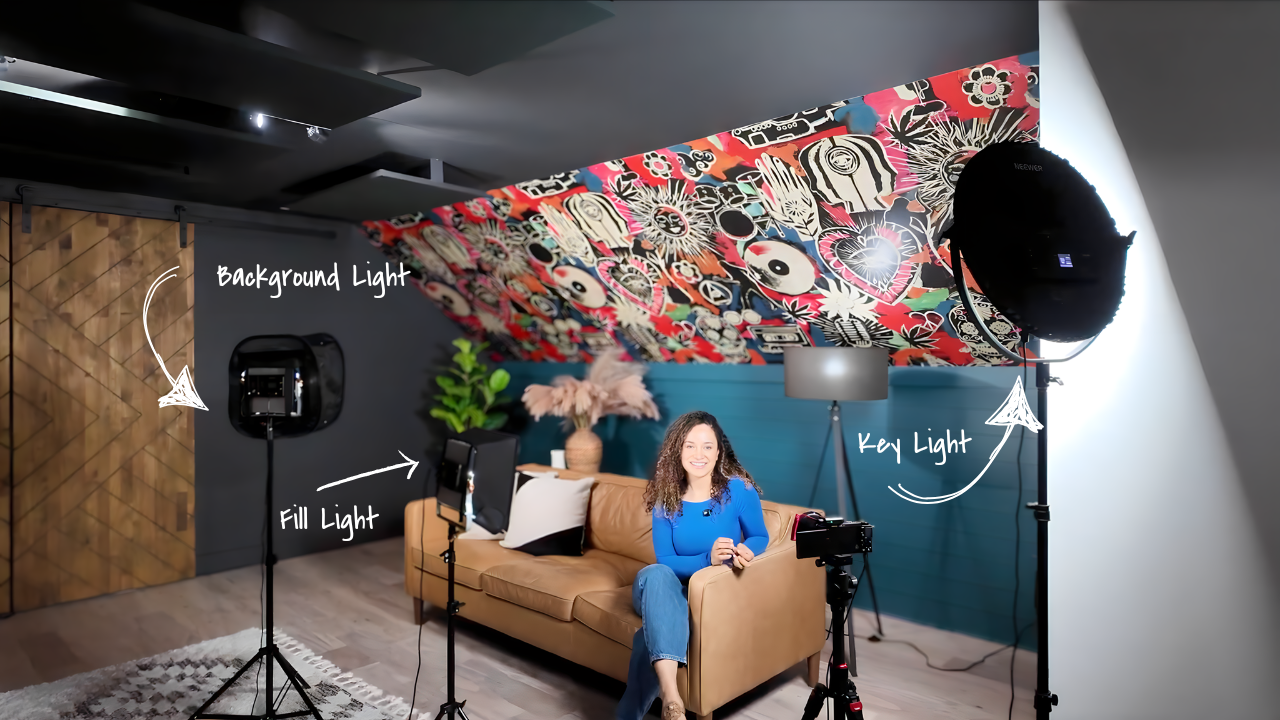
Step 4: Simple Studio Lighting Setup
Lighting is what separates amateur content from professional-quality video. The most effective beginner-friendly setup includes three lights:
Key Light: The NEEWER 18" RGB LED Round Panel Video Light is powerful, compact, and stylish. Place it at a 45° angle for natural light.
Fill Light: Use another panel with a parabolic softbox and grid diffuser to soften shadows.
Background Light: Add depth by aiming a third light with a softbox at your background.
This three-light system ensures you look clear, natural, and professional on camera.

This light will look gorgeous in any space, is easy to store, and is very powerful, which is what you want for your key light.
It’s also RGB, which means it changes color so that you can use it as your background light as well.
For my fill light, I’m using the Neewer LED panel paired with a parabolic softbox. The lights come in pairs, allowing you to use one as a fill light and the other as a background light. The parabolic softbox I use on the keylight focuses the beam, creating a soft spotlight effect that keeps the light directed right where I need it on me.
Let's see the shot look adding the three lights one by one:


The first photo on the left shows only the key light. In the middle photo, you can see the key light and fill light together. And in the photo on the right, the key, fill, and background lights are all on making the colors in the background really pop.
And this is how the lights look behind the scenes…
Step 5: Choose the Right Podcast Microphone
The next thing we need to complete our setup is a microphone.
The one I’m using here is the DJI Mic Mini; it’s a wireless mic that comes with a receiver you plug right into your camera. Super easy to use.
The mic itself attaches with a little magnet, so you can clip it on and forget about it. It produces a remarkably clean sound and is barely noticeable on camera.
Now, if you’re going for more of that “podcaster” look, you might prefer something like the RODE Wireless Interview Pro. It’s also wireless, but instead of clipping it to your shirt, you can hold it or place it on a mic stand.
I personally love wireless mics because they allow you to move around freely, with no cables to trip over or tether you to your computer or audio interface. Just hit record and you’re good to go.


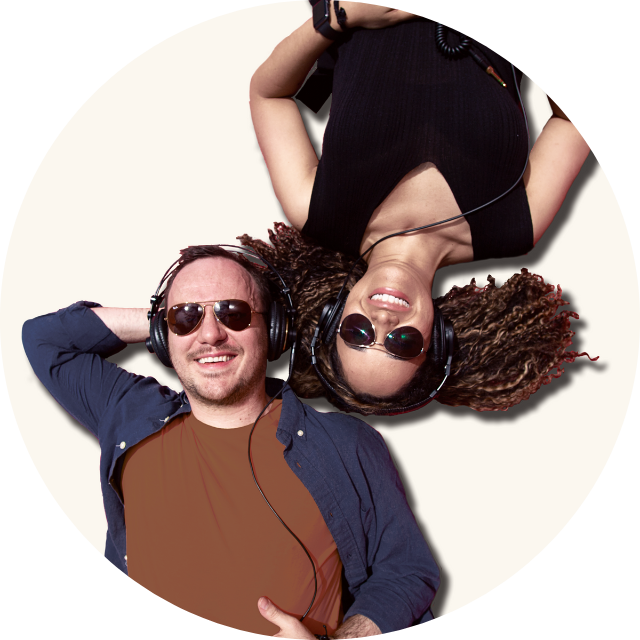
Bonus: Two-Person Podcast Setup ( Don’t Podcast Alone)
Just position your camera so it’s centered between the two of you, then adjust your lighting. Place the key light in the middle and angle each of your panel lights toward each person.
You’ll also need a second microphone. The good thing is that the DJI Mic Mini actually comes as a pair, which is perfect for this setup. Or, if you’re using the RODE Interview Pro, just grab a second one and you’re good to go.

Let’s Go Shopping ( Gear and Furniture links)
Camera https://geni.us/sG3mE8
Lens https://geni.us/epIabh
Tripod https://geni.us/u6Osdq
Lights
LED Round Panel https://geni.us/BKOIHyt
Panel Lights https://geni.us/p4AZlnM
Panel Lights Softboxes https://geni.us/sIH9N
Other things you will need:
Dummy Battery for the Camera https://geni.us/ggqTM35
Heavy Duty Light Stand for the LED Round Panel Light https://geni.us/BoRTQWz
My Favorite Faux Trees: https://geni.us/nAEZdp
Ready to Build Your Studio?
You don’t need a rental studio to launch your podcast or create professional video content. With the right gear and setup, your home office can transform into a space that builds your authority and helps you share your story.
If you’d rather skip the DIY stress, we can help you design, build, and manage your podcast studio from recording and editing to publishing and distribution.
And let’s make your home podcast studio a reality.