Your First Podcast Livestream: A Beginner’s Multi-cam Setup
So you want to live stream your podcast but feel overwhelmed by the gear, setup, and software options? Don’t worry, we get it. That’s why we made this video (and this blog!) to show just how simple and affordable it can be to stream a professional-looking podcast from your home setup.
In this crash course, Steven walks through every step of the process, from software choices to audio mixing to camera setup, all with real-time examples from Veronica’s live podcast, Content Sancocho. Whether you’re building your first studio or just curious about what goes on behind the scenes, this guide will help you go live with confidence.
The Beginner-Friendly Streaming Setup
Here’s what we used to build a powerful but simple live streaming setup, and how you can replicate it.
1. Streaming Software
OBS Studio: Free, open-source, and lets you stream and switch cameras right from your computer. Great for budget setups.
StreamYard: Easier to use, but not the best video quality.
Ecamm Live: Our favorite. It offers pro-level features like:
Scene creation and transitions
Text overlays and countdown timers
Live guest support
Multi-camera switching
Comment displays during streams
With Ecamm, you can build a show that looks polished without needing a huge tech background.

2. Audio Gear: RODECaster Pro II & RODECaster Duo
The heart of the audio setup is the RODECaster Pro II (but the smaller RODECaster Duo works too). These mixers are packed with features that instantly level up your sound:
Live compression, EQ, and noise reduction
Sound effects and music playback
Multi-track recording onto microSD
Wireless mic input support (like the RODE Wireless ME)
Steven shows how to route clean audio into the video system using a balanced headphone-to-XLR cable. This way, the live stream sounds great and editors get clean, unedited tracks for post-production.
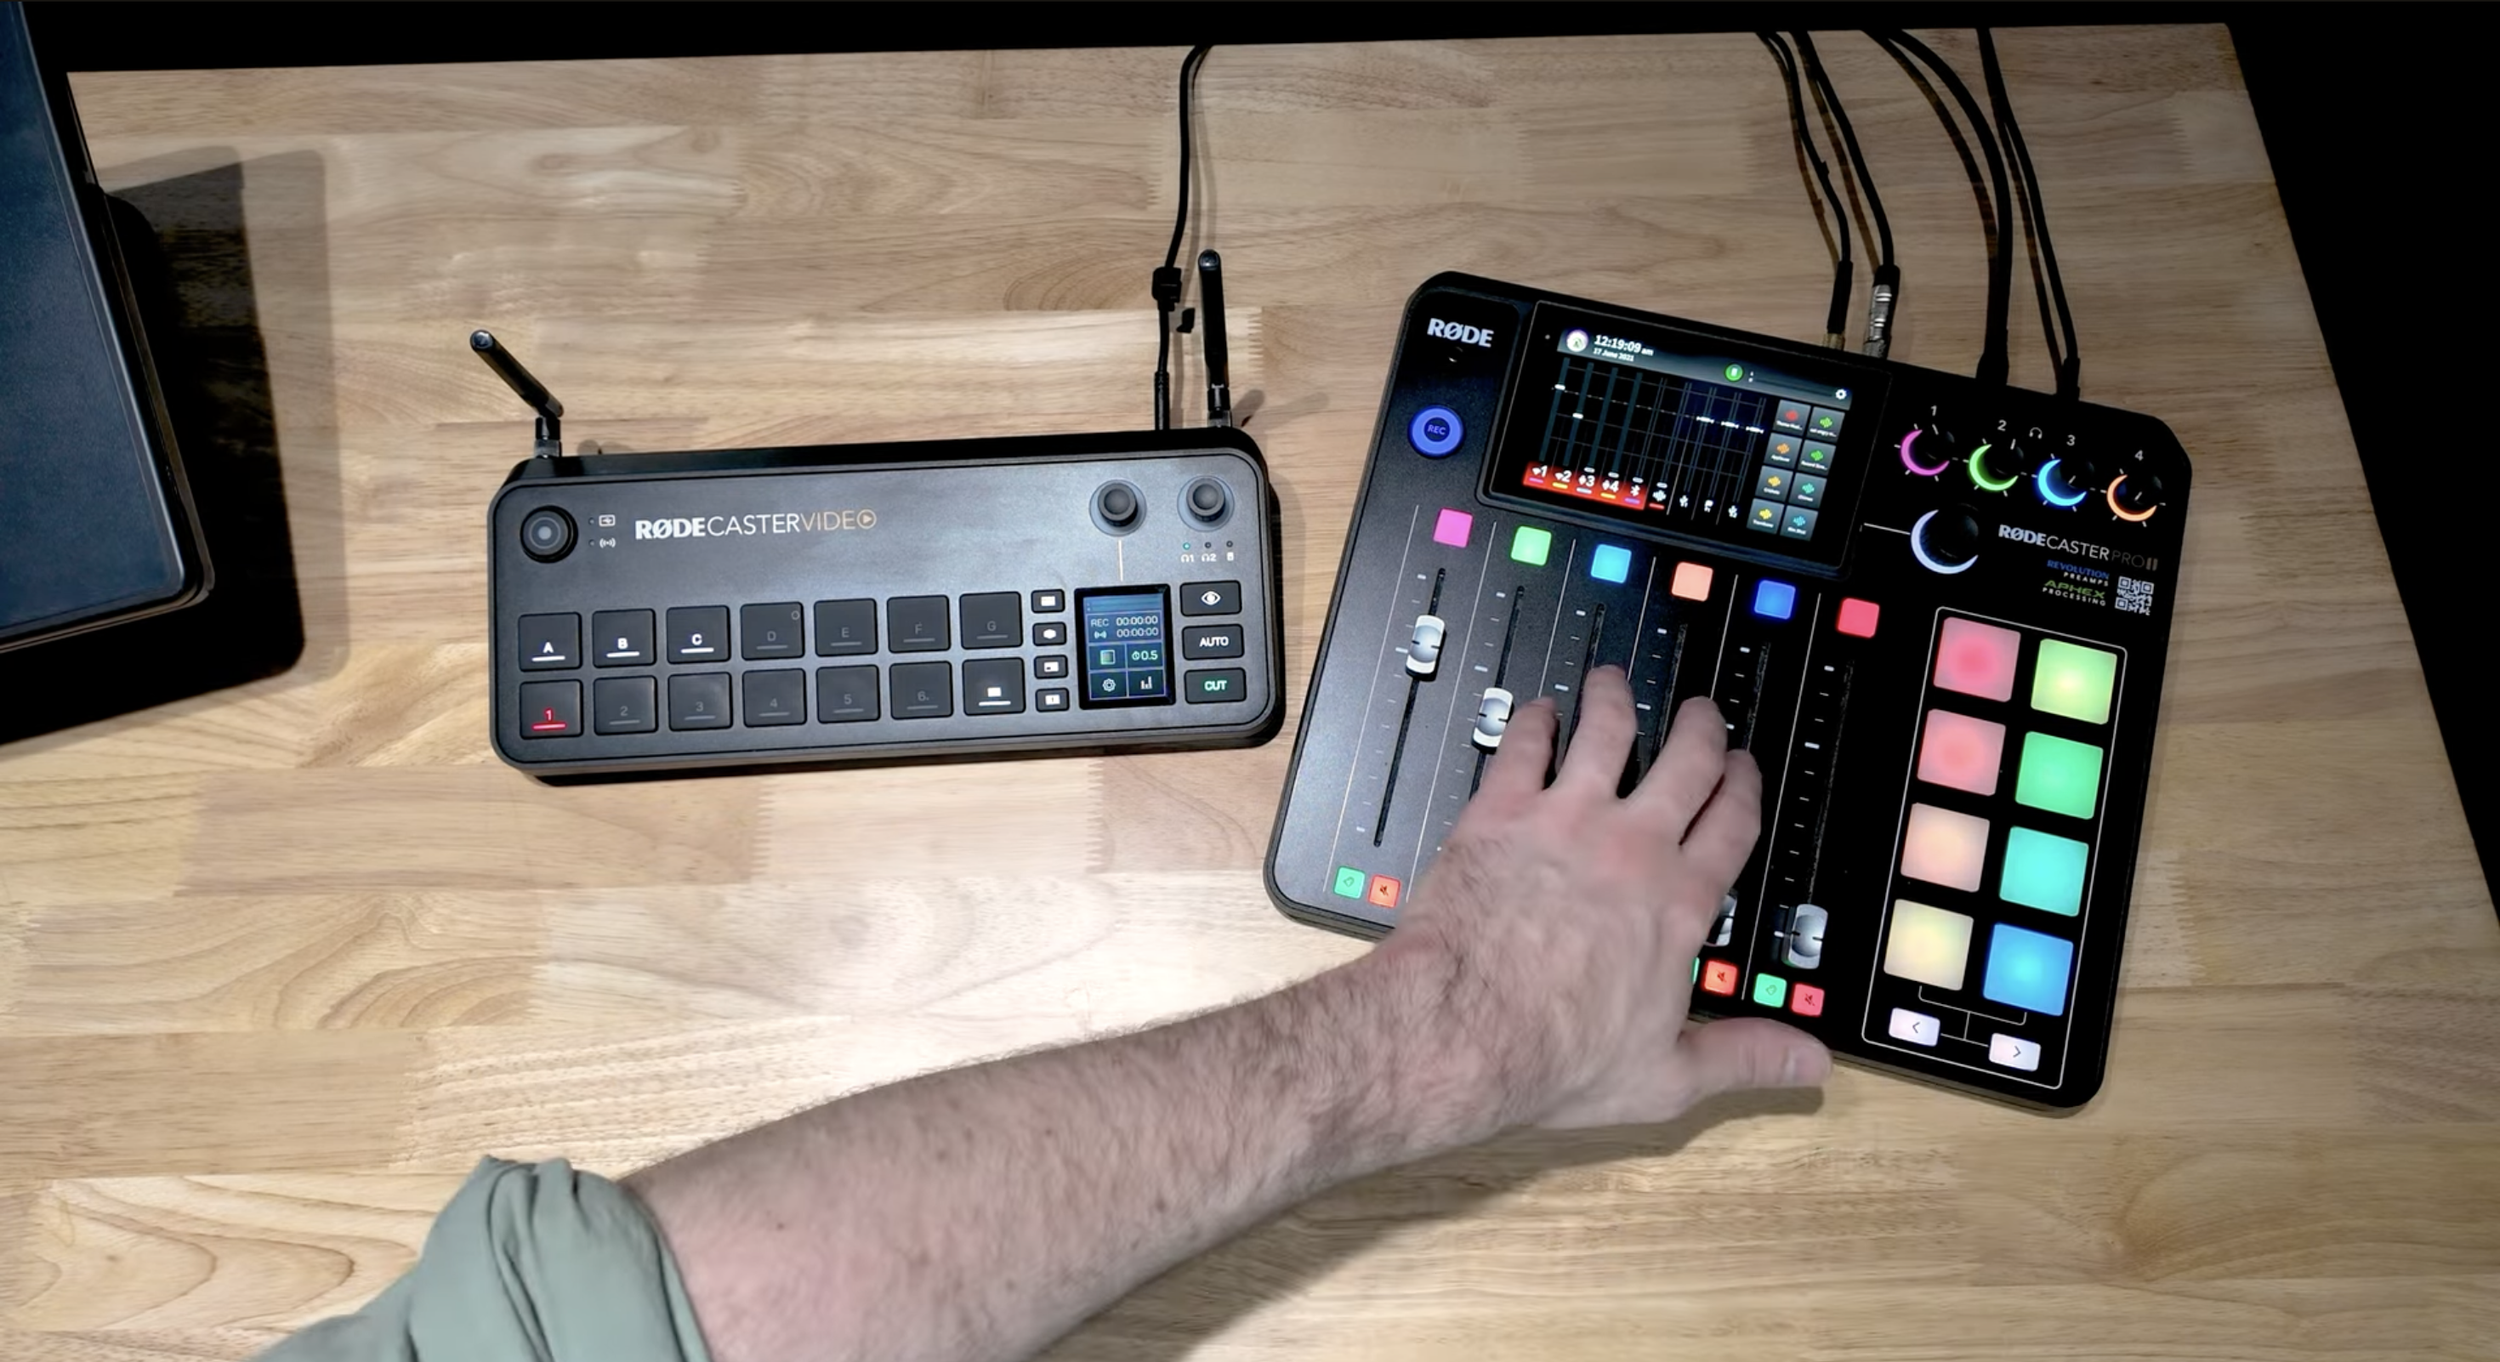
3. Camera Switching: RODECaster Video (RCV)
The RODECaster Video (RCV) is more than a switcher: it’s a full-on video production system.
Supports up to 6 camera inputs
Records each camera feed individually
Built-in scene creation with labeled buttons
Saves high-res video to USB or flash drive
Integrates perfectly with Ecamm Live for live switching
It’s plug-and-play once you get the hang of it, and you’ll love the flexibility it gives you in post.

4. Camera Setup: Sony ZV-1 + Sony A7 IV
You don’t need a full cinema rig to look good on camera. We used:
Sony ZV-1: A compact, beginner-friendly vlogging camera with a built-in zoom lens and skin-smoothing filter. Great for control room shots.
Sony A7 IV: A full-frame mirrorless camera with gorgeous depth, paired with a 50mm G Master lens for those pro-level main shots.
To keep the camera powered all stream long, Steven uses a dummy battery, which requires a small DIY notch to fit into the A7 IV, but it’s totally worth it.

Sony ZV-1

Sony A7 IV
5. Lighting Setup
Forget ring lights. If you want pro vibes, go for LED panel lights with softboxes. Here’s what we used:
Amaran 100d: A powerful LED light for the key light
Neewer Parabolic Softbox with Grid: Creates soft, directional lighting
C-Stand: Sturdy light stand to support your rig
Good lighting is a game-changer, and these tools keep it simple and cost-effective.
Bonus Tools & Tips
Mannequin Head: Seriously. Use it to test lighting and framing before your subject arrives.
HDMI Cables (30ft, 8K-rated): For connecting distant cameras or monitors
Monitor-on-a-Mic-Stand: Works as a DIY teleprompter alternative
MicroSD & USB drives: For recording directly from your switchers
Field Monitor or Flip Screens: To check your framing if you’re running solo
Final Thoughts
Live streaming your podcast doesn’t have to be a tech nightmare. With the right tools and a little help from Ecamm, RODECaster, and Sony, you can build a flexible, pro-level setup that’s totally beginner-friendly.
And if you want to see it all in action, check out the full behind-the-scenes video on our YouTube channel. You’ll get a real look at how we go live, including some fun surprises, last-minute setup checks, and Steven’s signature button-smashing style.
PSS Creative Media helps local businesses and creators in the Triangle turn their ideas into professional, high-impact content. From setup and strategy to editing and distribution, we make the process simple so you can focus on sharing your story.
Before you hit record, the most important step is designing a podcast setup that fits your show. Whether you're hosting solo, recording with guests remotely, or sharing the mic in-studio with a co-host, the right studio layout and gear make all the difference.
Solo Show:
Start simple with a solid USB mic like the Shure MV7 or Samson Q2U, a quiet recording space, and basic lighting if you're on camera. No need to overcomplicate, a clean mic setup and thoughtful background go a long way in building trust and professionalism.
Remote Interviews:
Use the same solo setup, but pair it with a reliable platform like Riverside.fm or Descript to record guests online. Make sure you wear headphones and prep your guest on sound quality — that alone levels up your audio big time.
In-Studio Guest or Co-Host:
This setup needs more gear. Use identical XLR mics for each speaker (we love the Shure SM7B) and connect them to a quality interface like the SSL2+ for clean, multi-track audio. Treat your space for echo and consider a simple dual-camera or wide-shot setup if you're filming.
Not sure where to start? PSS Creative Media can help you design the perfect setup for your show — from gear recommendations to visual layout. We even offer a free Studio Blueprint Builder tool to help you plan everything with zero guesswork.
Ready to launch?